Are You Using Your Meat Thermometer Wrong? Avoid 10 Mistakes

Using a meat thermometer should make cooking safer and easier, but many home cooks still end up with dry chicken, undercooked burgers, or endless guessing. Most of the time the problem isn’t the idea of using a thermometer, but it’s a few common mistakes that quietly ruin your results. Here are the 10 most common meat thermometer for cooking mistakes and the professional fixes to ensure your next meal is legendary.
Sticking the probe in the wrong place
One of the biggest reasons readings are “wrong” is simple placement. If you push the probe too shallow, you’re reading the hotter surface instead of the center. If you push too deep, you might hit the pan, bone, or grill grate. All of these heat up differently than the meat itself and can throw the reading off by quite a bit.
The fix is to aim for the thickest part of the meat, away from bone and fat. For a chicken breast, go in from the side toward the center. For a whole chicken or turkey, find the thickest part of the thigh and insert the probe so the tip sits in the middle of the meat, not touching the bone. For steaks, insert from the side toward the center rather than from the top. If in doubt, take two readings in slightly different spots to confirm.
Only checking one spot on large cuts
Big roasts, whole turkeys, and pork shoulders rarely cook perfectly evenly. The thickest part might be a few degrees cooler than the rest, and the area near the bone often lags behind. Many people insert the thermometer in one place, see a “safe” temperature, and pull the meat, only to discover a red, underdone patch when carving.
You can fix this by checking more than one area on large cuts. Start with the thickest part, then test near the bone and another thick section. If you’re using a multi‑probe wireless thermometer, you can leave one probe in the thickest part and briefly use another probe as an instant‑read to double‑check other spots. This gives you a more accurate picture of the whole roast and helps you avoid surprises at the table.
Taking the reading too early or not waiting long enough
Another common mistake is rushing the reading. With thicker cuts, it takes a few seconds for the probe tip to reach the true internal temperature. If you read the display immediately after inserting the probe, you’re mostly seeing the temperature of the outer meat layers the probe just passed through, which are usually hotter.
The fix is patience. Insert the probe and wait until the temperature number stops climbing before deciding whether the meat is done. For an instant‑read thermometer, that might be 3-10 seconds. For a leave‑in probe, watch the temperature trend; when it slows and stabilizes, that’s your real reading. If you see the temperature still rising quickly, your meat needs more time.
Ignoring carryover cooking
Even when you hit the exact temperature you want inside the oven or on the grill, the meat doesn’t stop cooking the moment you remove it from the heat. Residual heat continues to travel from the hot exterior toward the cooler center, raising the internal temperature by several degrees. Many cooks forget this and cook all the way to the final target in the oven, which often leads to dry results.
To fix this, you should pull the meat a few degrees before your final target and let carryover cooking finish the job while it rests. For example, if you want chicken to end around 165°F, you might remove it at 160°F and let it rest as the temperature creeps up. A good thermometer helps you see this rise in real time so you can build this step into your timing rather than guessing.
Not letting meat rest before cutting
If you slice a roast or chicken breast immediately after it hits temperature, you’ll see juices spill out onto the cutting board. This can make the meat look dry even if you cooked it correctly. The thermometer did its job, but you didn’t give the meat time to reabsorb and redistribute juices before slicing.
The fix is to rest your meat. For smaller cuts like chicken breasts or steaks, 5-10 minutes is usually enough. For bigger roasts or turkeys, 15-20 minutes (or even a bit longer) works well. Keep your thermometer probe in during the rest if you like, you’ll see the temperature rise slightly, then start to fall. When it begins dropping and the juices have settled, you’re safe to carve.
Trusting a badly calibrated thermometer
Sometimes the problem isn’t your technique, but it’s the thermometer itself. Low‑quality or older devices can drift over time. If your thermometer is off by even 5-10°F, you might consistently undercook or overcook meat without realizing it.
A simple fix is to test your thermometer in ice water and boiling water. Ice water should read close to 32°F, and boiling water around 212°F at sea level (adjust slightly for altitude). If your thermometer is significantly off and can’t be recalibrated, it’s time to replace it. For digital models that allow calibration, follow the manufacturer’s instructions to reset the reading.
Only using a thermometer for “special occasions”
A lot of people buy a meat thermometer for Thanksgiving turkey, then leave it in a drawer the rest of the year. Meanwhile, they continue guessing on weeknight chicken, pork chops, burgers, and fish. The result is inconsistent doneness and unnecessary stress.
The fix is to make the thermometer part of your regular routine, not just a holiday tool. Use it for:
l Chicken thighs and breasts on busy weeknights
l Pork tenderloin in the oven
l Burgers on the grill to avoid serving them raw in the middle
l Salmon or other fish, where the line between perfect and dry is thin
The more you use it, the better you’ll understand how your oven, grill, and stove behave and the less you’ll feel the need to overcook “just to be safe.”
Opening the oven or grill constantly to“check”
When you’re nervous about doneness, it’s tempting to keep opening the oven door or lifting the grill lid to poke or cut into meat. Every time you do this, you dump heat, extend the cooking time, and risk uneven cooking. It’s a vicious cycle: the more you check, the less predictable everything becomes.
The fix is to rely on leave‑in or truly wireless probes. Insert the probes once, close the door, and watch the temperatures from outside the oven or away from the grill. With a good multi‑probe thermometer, you know exactly what’s happening without lifting the lid, and you’ll see the temperature rise steadily until it hits your target.
Forgetting to monitor ambient cooking temperature
Focusing only on meat temperature is not enough in some situations, especially for smoking or long roasts. If your smoker or grill temperature swings wildly, you might still end up with tough, dry, or unevenly cooked meat, even if the final internal temperature looks right. Many home cooks never measure the ambient temperature at all; they only trust the built‑in lid thermometer, which is often inaccurate or placed too far from the food.
To fix this, it helps to monitor both internal and ambient temperatures. Place one probe in the thickest part of the meat and another at grate level near the food. This lets you keep your smoker or grill in the ideal range while the meat slowly reaches the desired internal temperature. With both numbers in front of you, you can adjust vents, burners, or oven settings before problems develop.
Trying to manage multiple dishes without enough probes
Cooking one steak is easy. Cooking four different dishes for a party, chicken wings, a pork roast, sausages, and a pan of mac and cheese, gets complicated fast. Many people try to juggle everything with a single instant‑read thermometer, constantly moving it between pans and guessing based on time. This is stressful and makes it more likely that something will be underdone or overdone.
The fix is to use a multi‑probe system that can watch several dishes at once. This becomes especially important for holidays, large gatherings, and game‑day spreads when you’re running the oven and grill at the same time. A wireless, app‑connected thermometer can quietly track everything in the background and only demand your attention when something actually needs you.
How Twin TempSpike Plus helps you avoid these mistakes
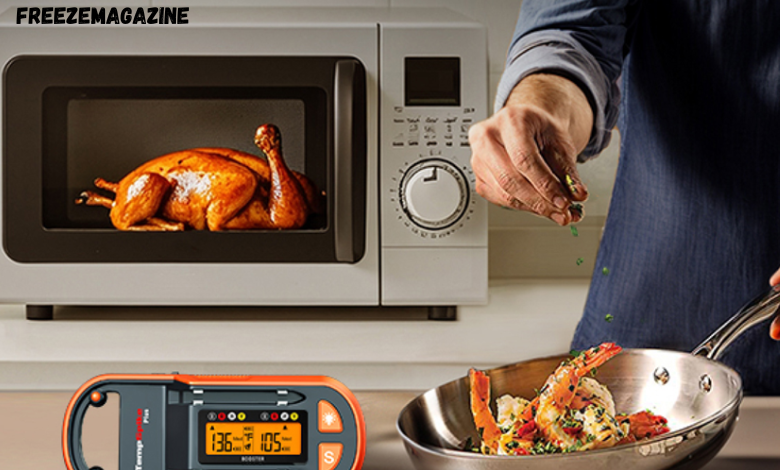
If you want to eliminate almost all these mistakes in one go, the Twin TempSpike Plus TP972 truly wireless meat thermometer is the gold standard for the modern American cook. It isn’t just a thermometer; it’s a high-tech kitchen assistant that removes the guesswork from the equation.
Truly wireless probes
The Twin TempSpike Plus uses two completely wireless probes that sit inside the meat while it cooks, with no long wires running out of the oven or grill. This means you can:
l Insert a wire-free probe into the thickest part of each piece of meat
l Close the oven or grill fully for even cooking
l Avoid cable tangles, pinched wires, and lid gaps that leak heat
The probes stay in place from start to finish, so you’re no longer tempted to keep opening the oven just to check.
600ft Bluetooth connectivity
The TP972 connects to your phone using Bluetooth for extended 600ft range when you’re moving around the house. You can:
l Check internal and ambient temperatures from your couch or dining room
l Keep an eye on long smokes or roasts while you prep side dishes
l Step away to entertain guests without losing track of your cook
You’re not tied to the grill or stove, and you don’t have to keep walking back to a separate base unit.
Monitors internal and ambient temperatures
Each probe of the Twin TempSpike Plus is designed to measure both the internal temperature of the meat and the ambient temperature around it. This directly addresses mistake #9. With one probe, you can see:
l What’s happening inside the meat
l Whether your oven, grill, or smoker is running hotter or cooler than you think
This dual reading makes it easier to maintain a stable cooking environment and adjust burners, vents, or rack positions as needed.
Two probe monitoring for two dishes
The Twin TempSpike Plus supports two probes so you can monitor two dishes at the same time. In a real‑world situation, like cooking chicken wings and a pork shoulder, or sausages, and a pan of baked mac and cheese for game day, you can assign one probe to each item. The app gives you a dashboard view of all active probes so you know exactly which dish is closest to being done.
This directly fixes mistake #10. Instead of juggling a single thermometer between pans, you set everything up once and let the Twin TempSpike Plus track two dish while you focus on timing breads, salads, and drinks.
Customizable target temperatures and alerts
Through its companion app, the Twin TempSpike Plus lets you set custom target temperatures or use built‑in presets for common meats and doneness levels. Once a probe reaches the target:
l The app sends you a notification
l You can see which probe triggered it and which dish it belongs to
This solves several issues at once:
l You don’t have to keep watching the clock (helping with mistake #3).
l You can deliberately pull meat a few degrees early to allow for carryover cooking (fixing mistake #4).
l You’re less likely to overcook because you got distracted with guests or side dishes.
Rugged and Rechargeable
The probe is crafted from food-grade stainless steel and 1050℉ high-temperature resistant ceramic. It’s easy to clean and built to survive the intense heat of a searing grill. Plus, the charging dock ensures your thermometer is always ready for the next big cookout.
Conclusion
Cooking the perfect meal is a balance of art and science. By avoiding these 10 common mistakes, like poor placement and ignoring carryover cooking, you are already ahead of 90% of home cooks.
To truly master the craft, you need tools that match your ambition. The Twin TempSpike Plus TP972 Truly Wireless Meat Thermometer provides the accuracy, range, and data you need to turn every dinner into a masterpiece. Stop guessing, stop poking, and start cooking like a pro. Your friends and family (and your taste buds) will thank you.


Post Comment