Die Casting Mold Maintenance Guide
If you run a die casting operation, you know how important the mold is. A good mold can produce thousands or even millions of parts. But without regular care, it wears out fast, causes defects, and leads to expensive downtime. This guide walks you through everything you need to keep your die casting molds in top shape. We cover daily tasks, weekly checks, deeper maintenance, common problems with fixes, storage tips, and why preventive care pays off. Follow these steps, and you can extend mold life, cut costs, and keep production running smooth.
Why Die Casting Mold Maintenance Matters
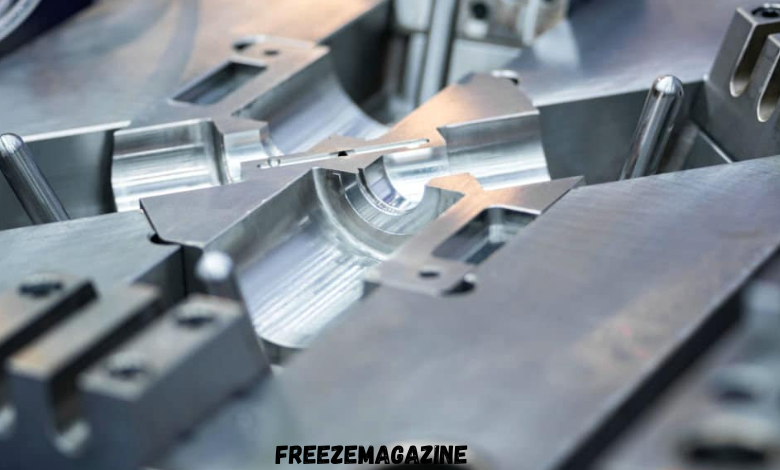
Die casting molds face tough conditions. Hot molten metal shoots in at high pressure, then cools quickly. This creates thermal stress, erosion, and wear on surfaces. Poor maintenance leads to cracks, soldering where metal sticks to the mold, or heat checking – those fine surface cracks from heat cycles.
Good maintenance reduces downtime by a lot. Some shops see 60% less unplanned stops with regular care. It also improves part quality, lowers scrap rates, and saves money on repairs or new molds. A well-maintained mold lasts longer, sometimes doubling or tripling its shot count.
Daily Maintenance Tasks
Start each day with quick checks to catch issues early.
First, look over the mold visually before and after runs. Check for metal buildup on the parting line, flash, or residue in cavities. Wipe away loose debris with a soft brush or cloth. Never use hard tools that scratch the surface.
Check temperatures. Make sure the mold preheats properly – usually 300 to 425°F for aluminum dies. Use thermocouples or infrared guns to verify even heating. Avoid shooting cold molds, as this causes thermal shock and cracks.
Lubricate moving parts like slides, ejector pins, and cores lightly with the right die spray or lube. Too much can cause buildup; too little leads to sticking.
At the end of each shift or run, clean the mold surface gently. Remove aluminum residue or oxide with non-abrasive methods. Blow out cooling channels to ensure no blockages.
Log everything – shots made, any issues seen, and actions taken. This history helps spot patterns.
Weekly and Monthly Checks
Once a week, do a bit more.
Disassemble what you can safely. Clean slides, cores, and ejector systems fully. Inspect for wear on pins – measure them if possible. Replace bent or worn pins right away.
Look at cooling lines for scale or corrosion. Flush them if flow seems low. Check hoses for leaks.
Every month or after a set number of shots – say 5,000 to 10,000 – go deeper. Open the mold fully and inspect cavities for heat checking or erosion at gates. Polish minor issues lightly to remove buildup. Check shut-offs and locks for damage.
Stress relieve the mold every 20,000 to 30,000 shots or after big repairs. Heat it slowly in a furnace to relieve internal stresses from welding or heavy use.
Track these in a schedule. Tie tasks to shot counts rather than just calendar days, since production volume varies.
Common Problems and How to Fix Them
Here are the top issues in die casting molds and simple solutions.
- Heat checking: Fine cracks from repeated heating and cooling. Fix by controlling temperature swings – preheat properly, use consistent die temps, and avoid fast cold starts. Polish out early cracks, then stress relieve. Some add coatings for extra protection.
- Soldering: Metal sticks to the mold surface. Caused by high local temps or poor release. Use better die spray, improve cooling in problem areas, or lower injection speed slightly. Clean soldered spots carefully and polish.
- Erosion: Wear at gates or runners from high-velocity metal. Reduce injection pressure if possible, or redesign gates for better flow. Polish and repair eroded spots regularly.
- Cracks: From thermal fatigue or poor setup. Prevent with even heating, no cold shots, and regular stress relief. For big cracks, weld carefully with pre- and post-heating, then test.
- Flash: Excess metal at parting lines. Check clamping force, clean parting surfaces, and repair damaged edges or locks.
Porosity or defects in parts often trace back to mold issues like blocked cooling or buildup. Fix the mold to improve casting quality.
Proper Storage When Not in Use
If the mold sits idle, store it right to avoid rust or damage.
Clean it thoroughly first. Apply a protective oil or rust inhibitor to all surfaces, especially cavities and cores.
Store in a dry, climate-controlled area – around 68–72°F and 40–60% humidity. Avoid damp spots.
Cover the mold to keep dust out, but allow some air flow.
Support it properly to prevent warping – use stands or blocks under heavy sections.
Before reuse, clean off the protectant and inspect fully.
When to Repair or Replace
Small fixes like polishing or pin replacement happen during routine maintenance.
For bigger damage – deep cracks, major erosion, or warped sections – send to a specialist. Welding, heat treating, or coating can bring it back.
If repair costs approach 50% of a new mold price, or if the mold has hit its expected life (often 100,000+ shots for good H13 steel), plan for replacement.
Good record-keeping helps decide – track total shots, repairs, and part quality over time.
Tips for Better Mold Life
Preheat every time and run continuous production when possible to cut thermal shock.
Control die temperature evenly – use good cooling systems and hot oil if needed.
Train operators on setup and care. Wrong handling causes most early failures.
Use high-quality die steel and follow heat-treat specs.
For expert help with die cast tooling, check out reliable sources that specialize in design and build.
Conclusion
Maintaining die casting molds is not hard if you make it a habit. Daily cleaning and checks, weekly inspections, scheduled deep maintenance, and quick fixes for problems keep molds running longer and producing better parts.
Set up a clear schedule, train your team, and keep good logs. The upfront time pays back in less downtime, lower costs, and happier customers.
Start small – improve your daily routine first – and build from there. Your molds will thank you with more shots and fewer headaches.


Post Comment